AR Placement
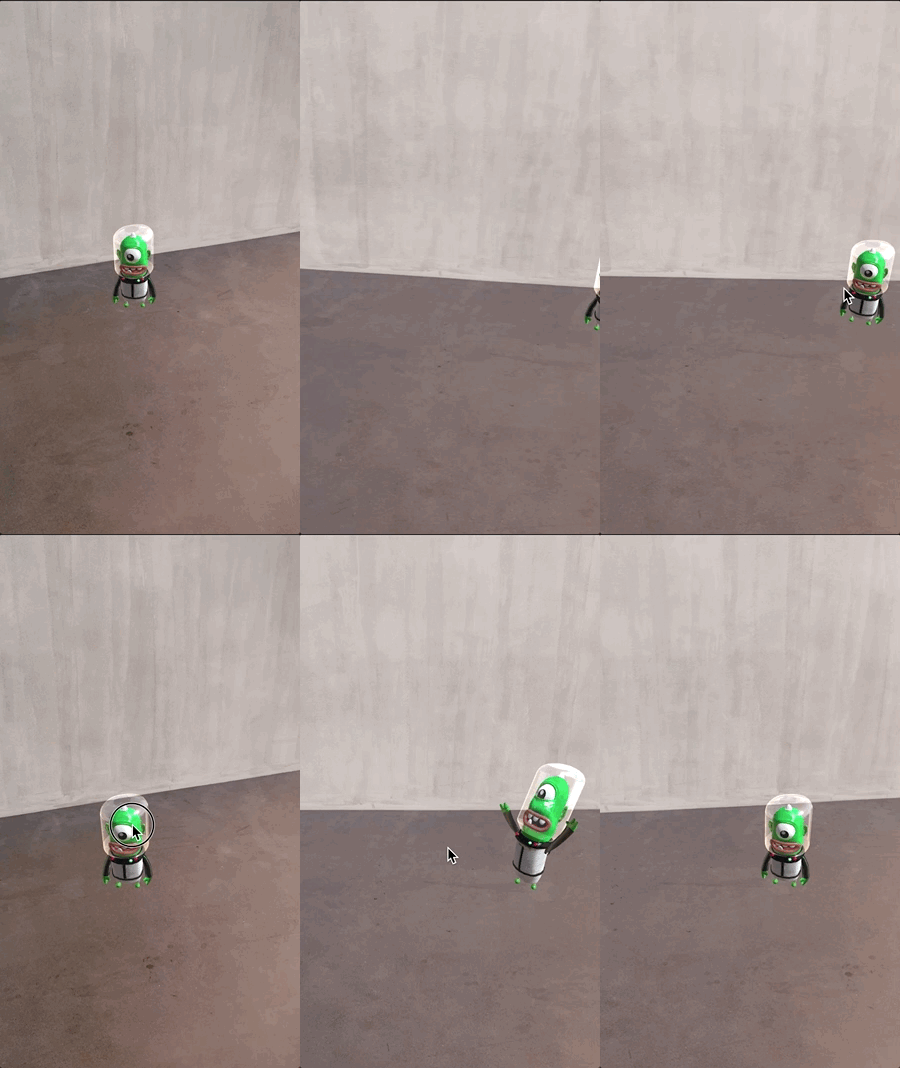
This tutorial will show you how to create AR placement effects using a template, replace relevant 3D objects, and use the tap and drag interactions.
Prepare Your Assets
Before we get started, you’ll want to prepare the 3D model and its texture that will be used in the effect. For this tutorial, we will use a simple sphere. You can download it here:
Open the Template
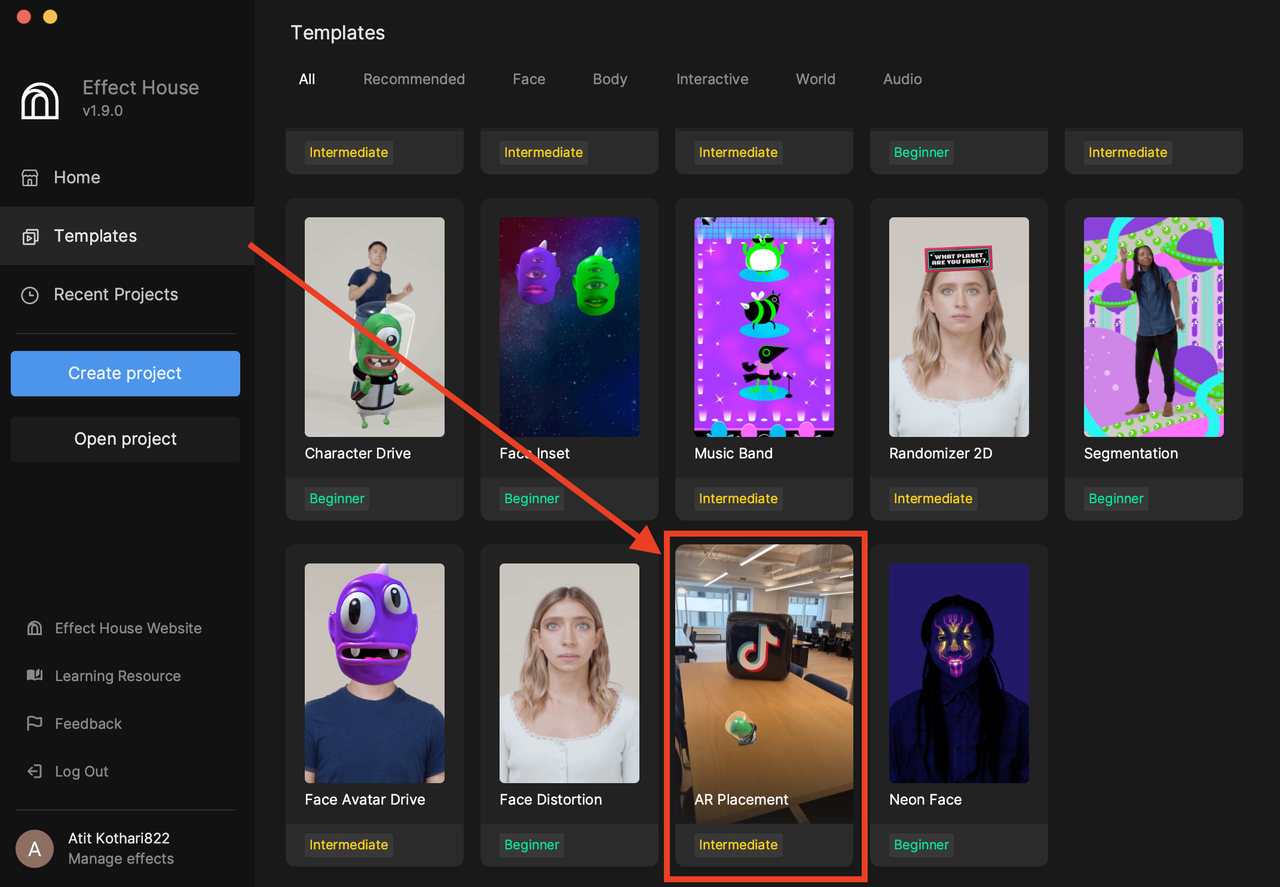
Start by opening Effect House and logging in with the account that you want to use to publish your effect. Go to Templates and select the AR Placement template.
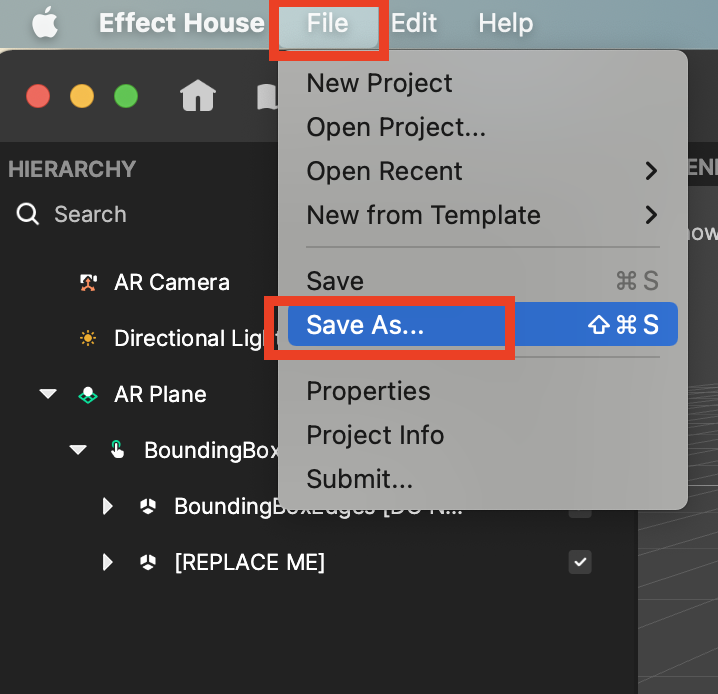
Let the template project load and then save your project to a folder of your choice.
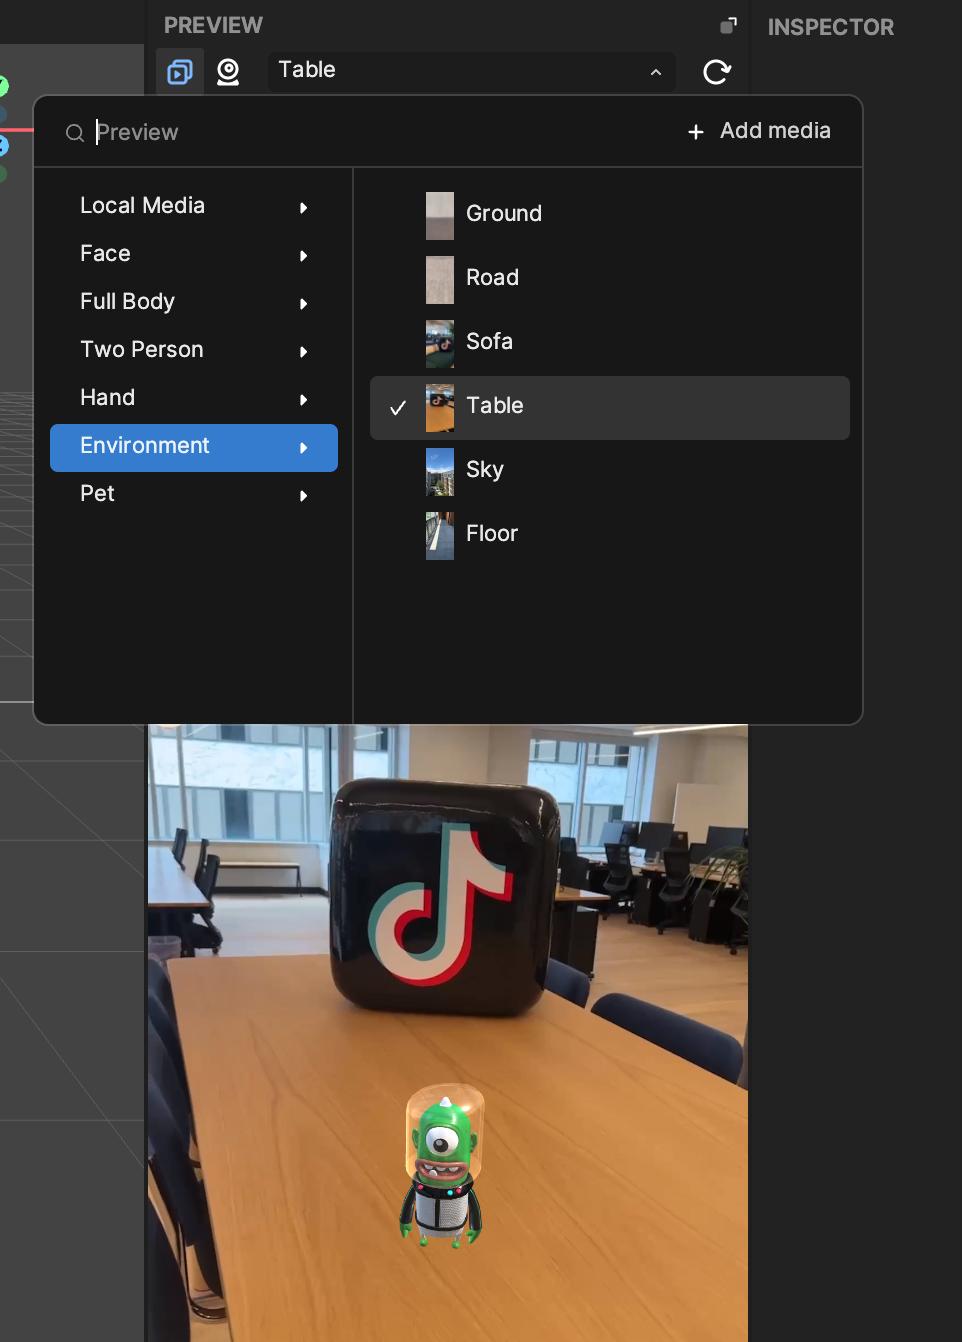
For this tutorial, change the preview video source by going to Environment > Table in the Preview panel. This allows you see your model placed on a table surface.
Swap Your Assets
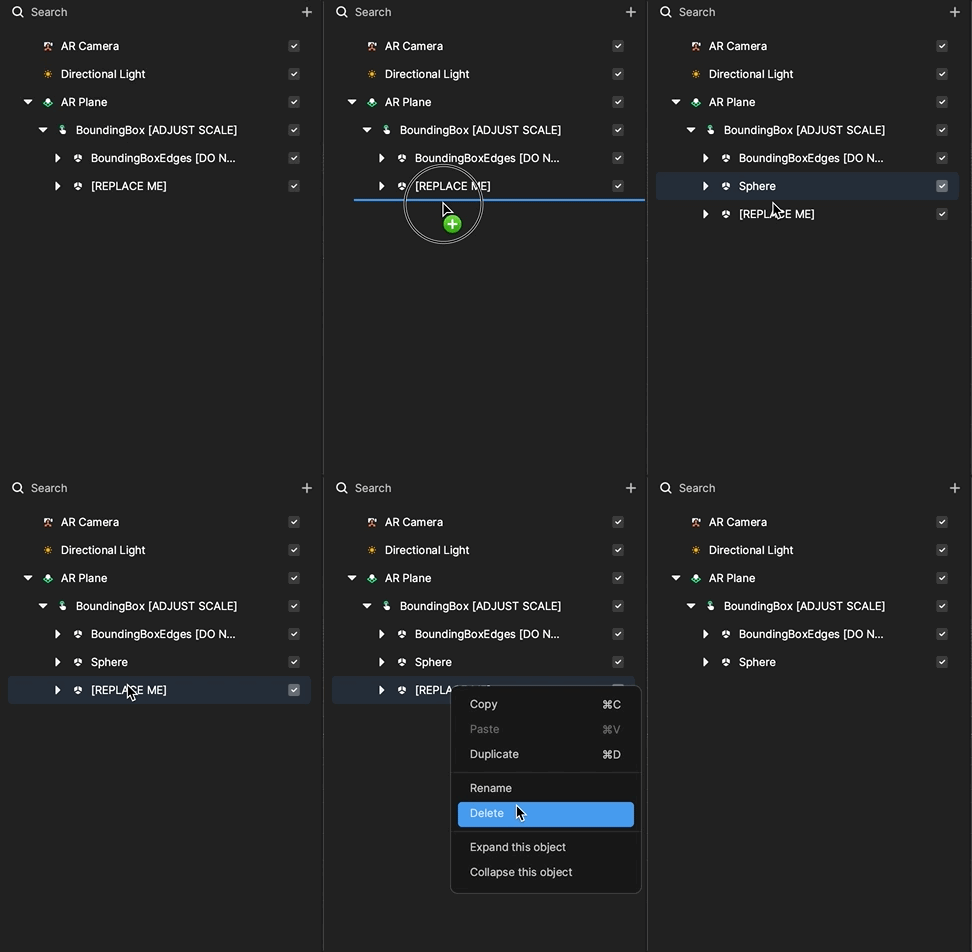
After the assets have been imported, you can start using them by replacing the default scene object.
Scale Your Model
Next make sure the scale of the model is correct.
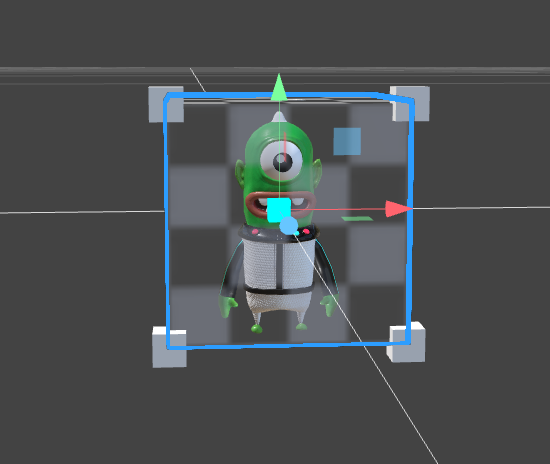
The model must fit inside the bounding box. This can be done by either scaling the bounding box and the placing the model inside it, or by scaling the model itself.
The 3D model is scaled down here.
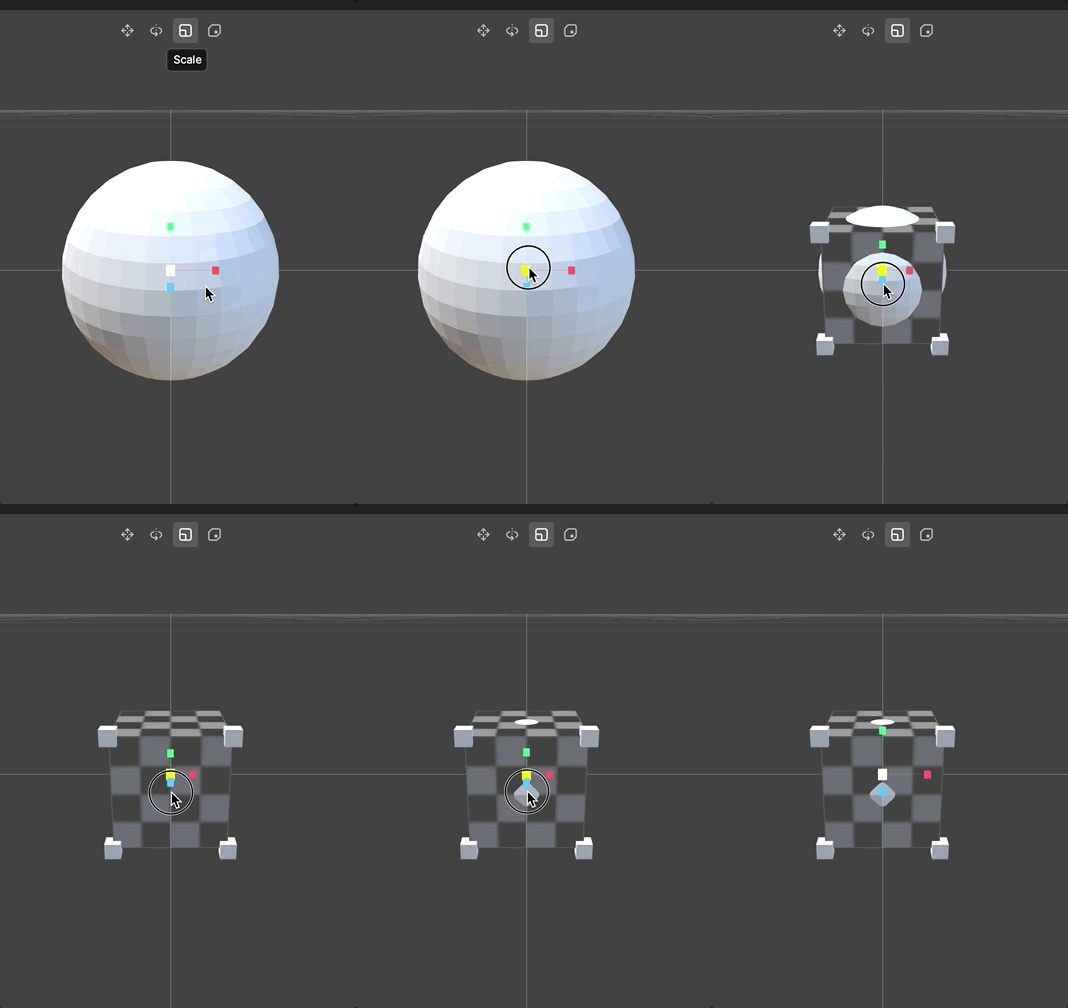
The bounding box is scaled up here. Ensure that the bounding box is not too big, otherwise it will interact with the AR Camera.
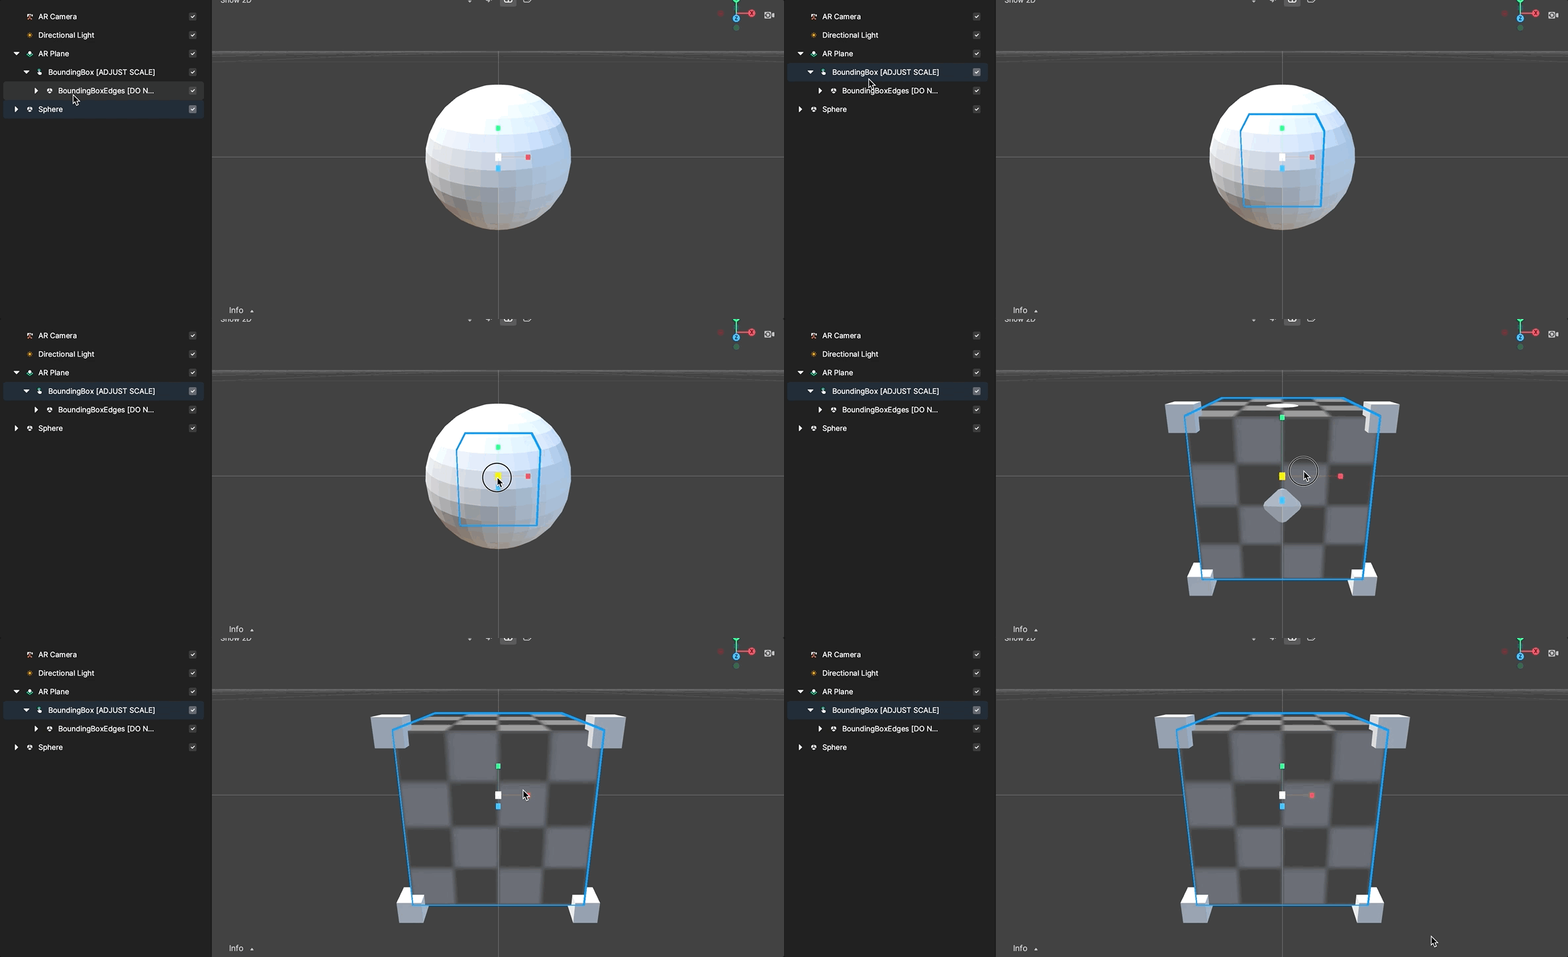
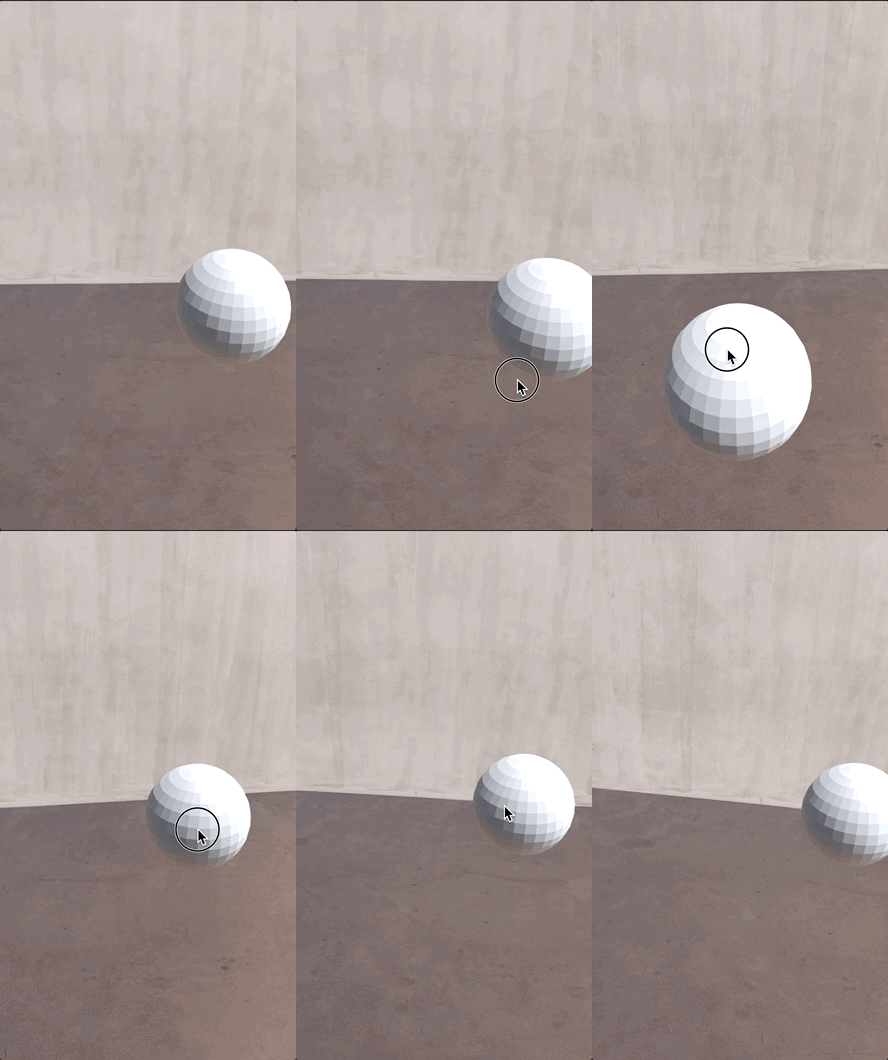
Swapping the assets and adjusting the scale will result in a model similar to the following.
Visual Scripting
There are four main groups in the Visual Scripting graph for this template, as shown below. Let’s dive into each one!
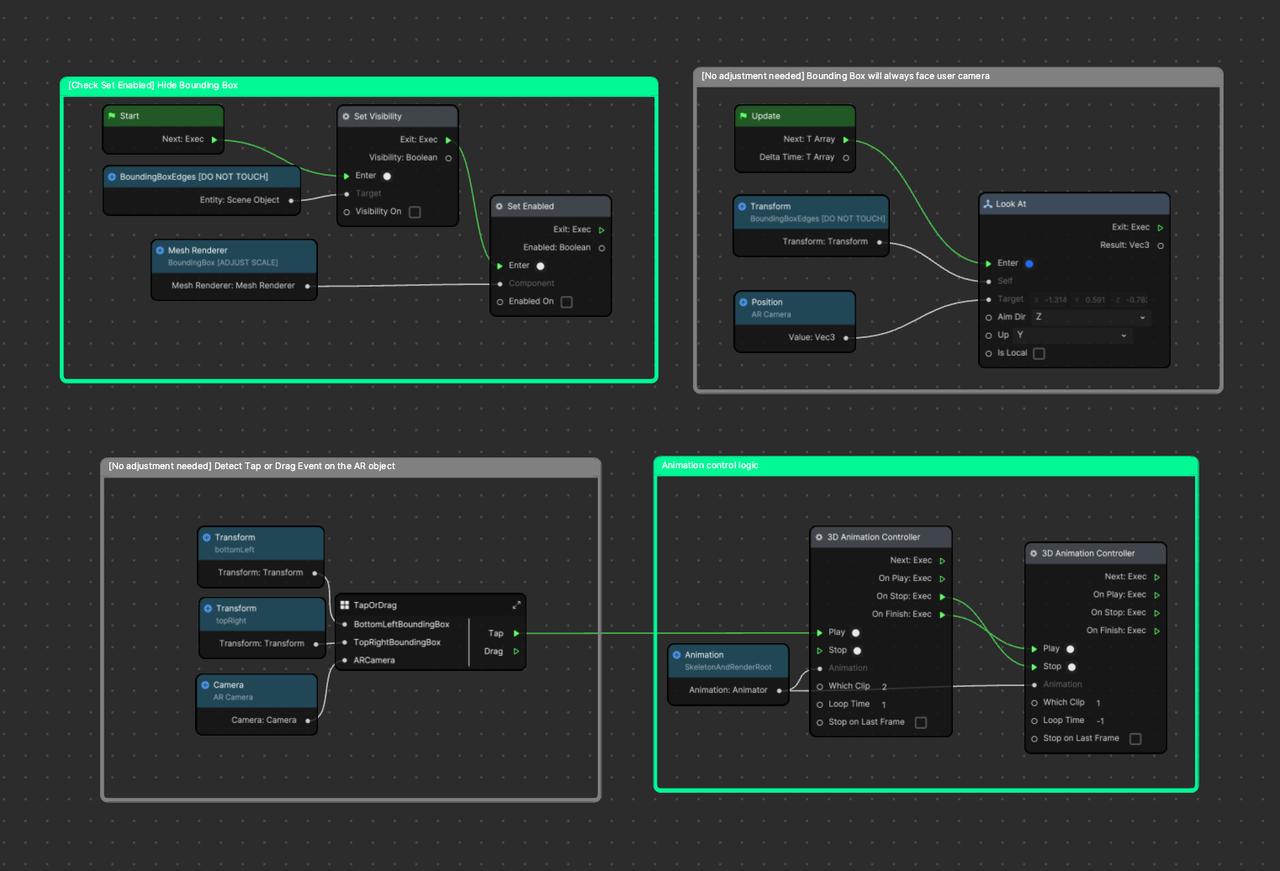
Start with the one in the top-left.
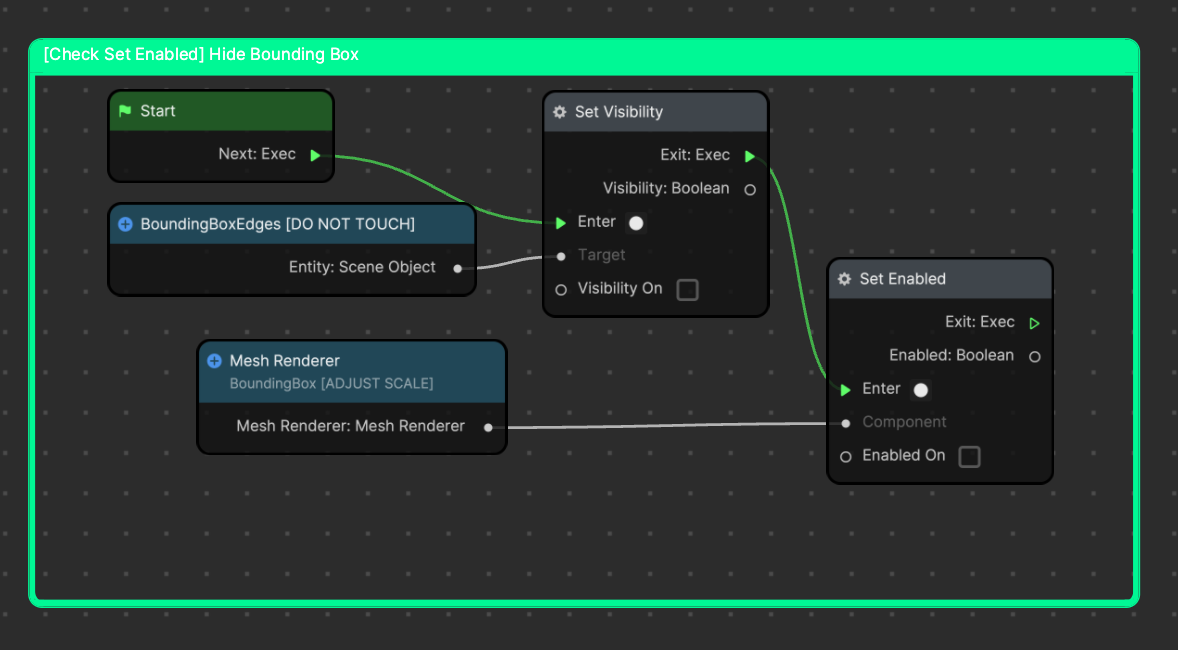
This part of the Visual Scripting logic hides the bounding box and the bounding box edges on Start.
This hides the unnecessary meshes when the effect is loaded on your phone, as well as in the Preview panel. However, it can be seen in the Scene panel. This allows you to adjust and scale the model, making sure the model is within the bounding box.
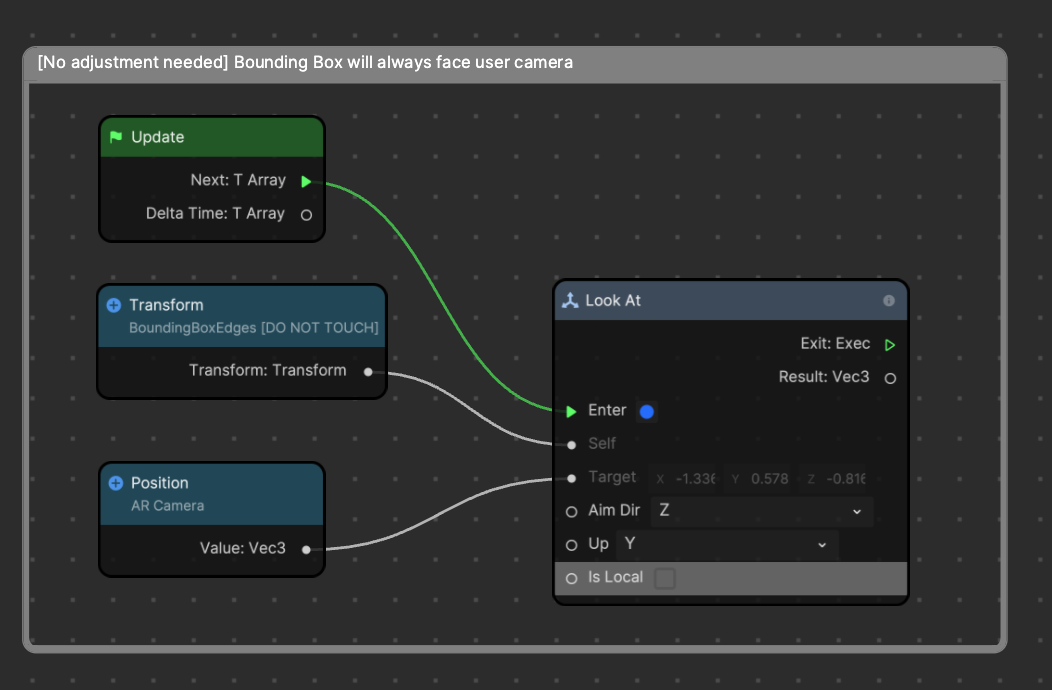
The next piece of logic forces the bounding box to always face the camera. All interactions on the object are registered inside the bounding box, so you must ensure that the bounding box always faces the camera even when the object is rotated away from the camera. You do not need to make any adjustments here.
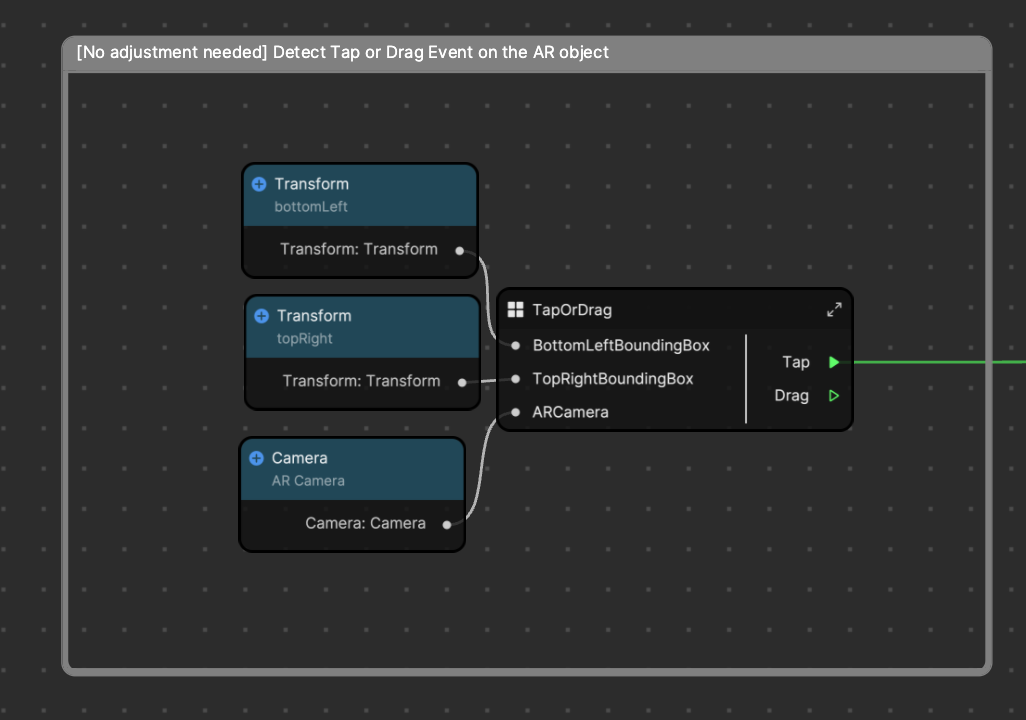
The TapOrDrag subgraph takes input as the edges of the bounding box and the AR camera object. It then returns a Tap event if a tap is detected on the object, or returns a Drag event if object is being dragged by the user. You do not need to make any adjustments for the inputs of the subgraphs.
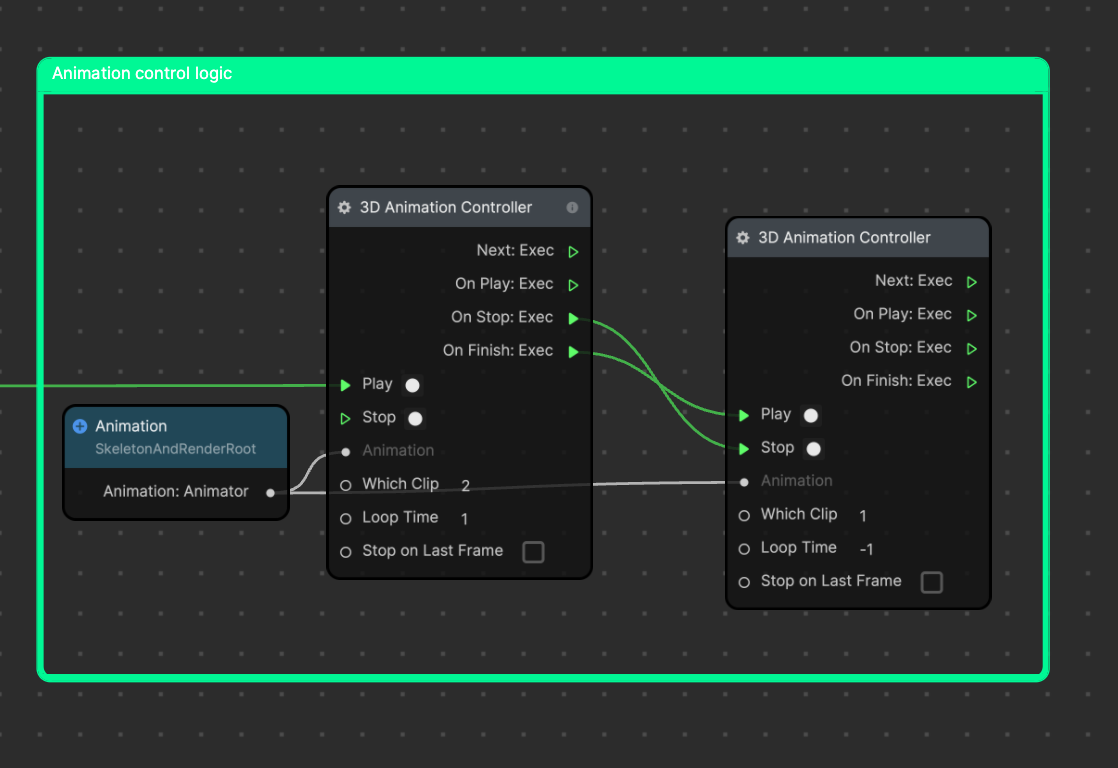
If your imported model contains an animation and the effect needs to trigger a certain animation clip based on the interaction, see the following animation control logic. This logic is an example of how it can be used in the template. If your object does not need animation control, then you can remove these nodes.
