Standard PBR and Standard Unlit
Material Editor has two material modes, the no-light model Standard Unlit, and the physically-based rendering model Standard PBR. These two material modes can be leveraged to set the output color of the shader.
Standard PBR
The Standard PBR material mode utilizes physical laws for light and material surface properties to create more realistic materials. The Standard PBR material mode is affected by scene lighting.
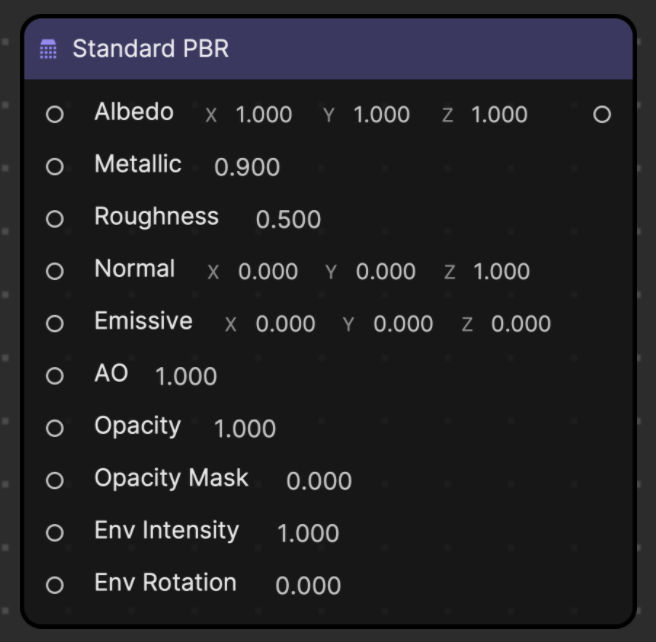
PBR materials refer to some materials that apply a shading model based on real physics principles. PBR technology uses physical laws to simulate light reflection, refraction and material surface properties, which can obtain more realistic rendering effects.
The follow are the node functions:
- Albedo: Material base color
- Metallic: Metallic degree
- Roughness: Roughness
- Normal: normal direction in tangent space, used to input normal map
- Emissive: Self-luminous color
- AO: Ambient occlusion for incoming AO maps
- Opacity: Color transparency
- Opacity Mask: Opacity mask, pixels with mask lower than 0.2 will not be displayed. Opacity Mask is checked to take effect.
- EnvInt: Ambient intensity. The brightness of the environment, the higher the value, the brighter the ambient light
- EnvRot: Environment rotation. The viewing angle of the environment is rotated
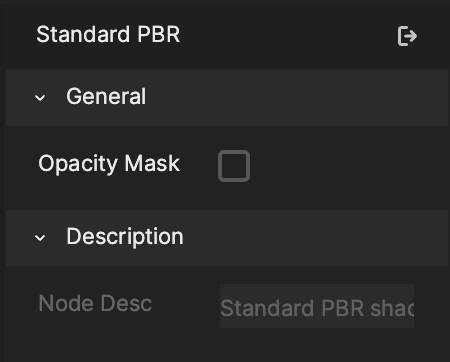
Use the Opacity Mask port for cropping, pixels with mask values below 0.2 will not be displayed. The Opacity Mask setting is accessible in the Details sidebar.
Standard PBR Properties
Albedo
Albedo is a vec3 that controls the material's base color.
Metallic
Metallic is a float that controls how metallic the material surface appears to be. A value of 1.0 corresponds to high metallicity, while a value of 0.0 corresponds to no metallicity.
Roughness
Roughness is a float value that controls how rough the material's surface is. A value of 1.0 corresponds to high surface roughness, while a value of 0.0 corresponds to no surface roughness.
Normal
Normal uses a vec3 input to control the direction of the normal in tangent space, and can be used to input a normal map.
Emissive
Emissive utilizes a vec3 value to create an emissive material surface combined with the Albedo.
AO
AO is a float value that controls the ambient occlusion of the material for incoming AO maps.
Opacity
Opacity works similarly to the Standard Unlit node's Opacity field. It controls the transparency of the material.
Opacity Mask
Opacity Mask works similarly to the Standard Unlit node's Opacity Mask field. If the Opacity Mask value is set below 0.2 then that pixel is discarded. The Standard PBR node's Opactity Mask checkbox must be checked in the Details sidebar.
Env Intensity
Env Intensity represents ambient light intensity. It is a float value that controls the brightness of the ambient light incoming from the environment map. The higher the value, the brighter the ambient light is.
Env Rotation
Env Rotation represents environment rotation, which is the viewing angle of the environment.
Create a Basic Gold Metal Material
Start by downloading the following material file:
Based on the information and properties listed above, you can easily create a basic gold material!
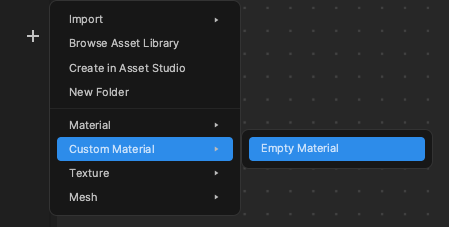
First click on the Add button [+] in the Assets panel, go to Custom Material, and select Empty Material. Rename your Empty Material to "Gold".
Then add a Sphere object in the Hierarchy panel. You will add your custom material to this object. Select the Sphere object, go to the Inspector panel, and then click the Material field. Select your new Gold material.
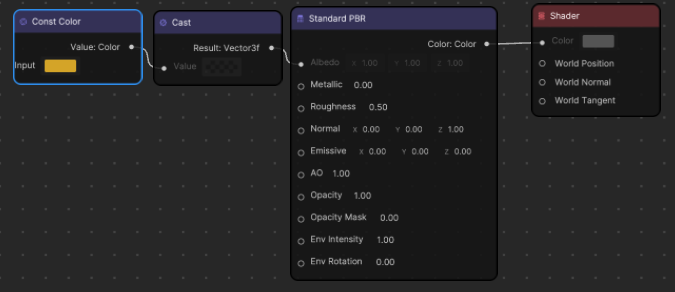
Next, add a Standard PBR node to Material Editor. Connect its Color: Color output to the Shader node's Color input.
Then add a Const Color node. Add a Cast node, and connect the Const Color node's output to the Cast node's input.
Select the Cast node and then click the Details button in the Material Editor toolbar. Change the Cast Type to Vec3. Now you can connect the Cast node's output to the Standard PBR node's Albedo input.
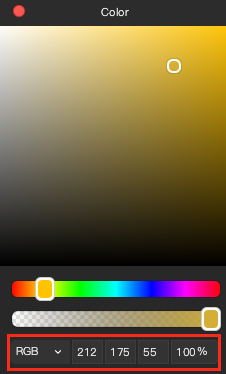
Click the Input color field in the Const Color node. Use the Color Picker to change the color value to RGB (212, 175, 55). This approximates a gold color.
To modify how metallic the material looks, add a Const Float node and connect it to the Standard PBR node's Metallic input. Change the Const Float node's Input value to 0.80.
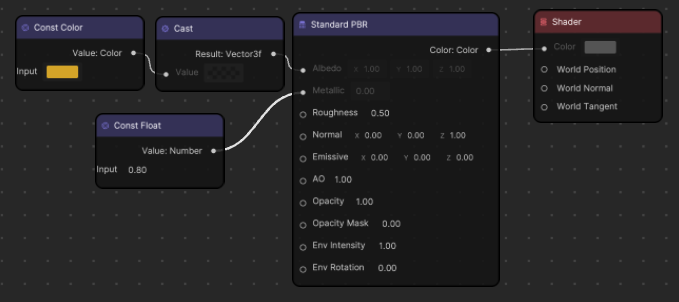
Congrats! You've just successfully created a basic gold metal material!
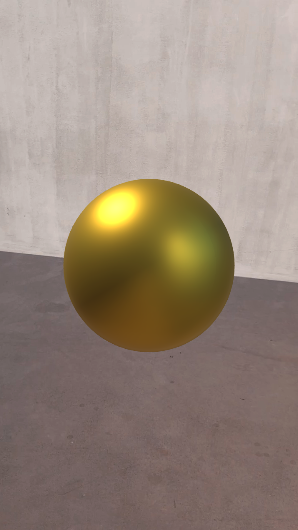
To simulate other materials, you can use the following Metallic and Roughness settings with the Standard PBR material model:
- Metal: Metallic = 1.0, Roughness = 0.2
- Plastic: Metallic = 0.0, Roughness = 0.0
- Wood: Metallic = 0.0, Roughness = 0.5
Standard Unlit
The Standard Unlit material mode is not affected by scene lighting. The color that is rendered by the material is based on the base color of the material provided via the Albedo and Opacity controls.
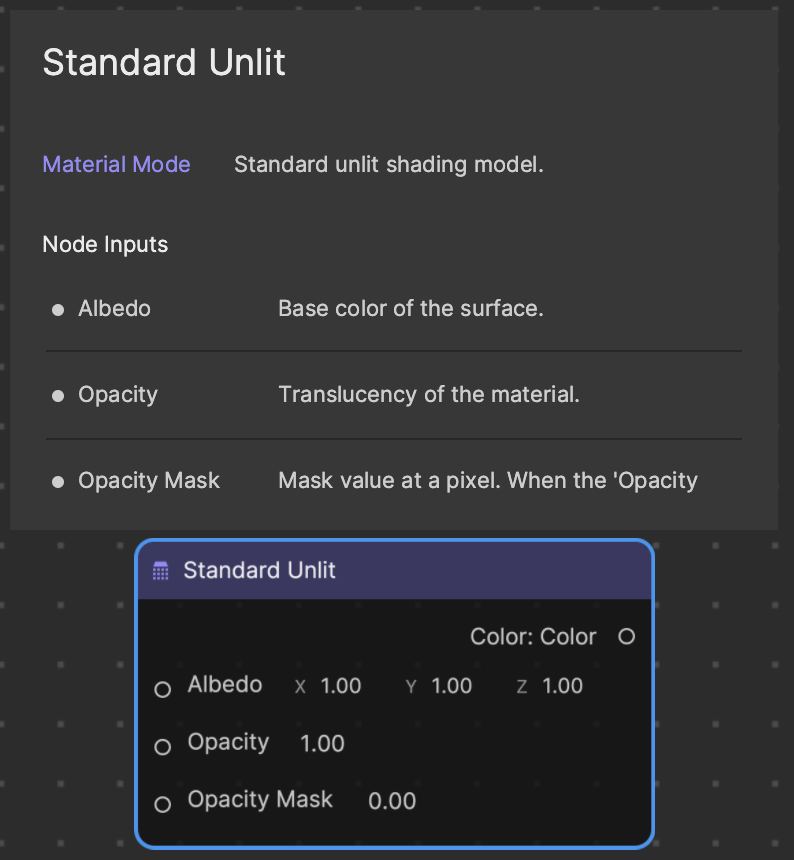
The follow are the node functions:
- Albedo: Material base color
- Opacity: Color transparency
- Opacity Mask: Opacity mask, pixels with mask below 0.2 will not be displayed. Opacity Mask is checked to take effect.
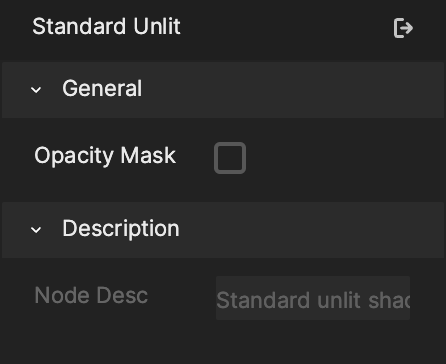
Use the Opacity MaskOpacity port for cropping, pixels with mask values below 0.2 will not be displayed. The Opacity Mask setting is accessible in the Details** sidebar.
Standard Unlit Properties
Albedo
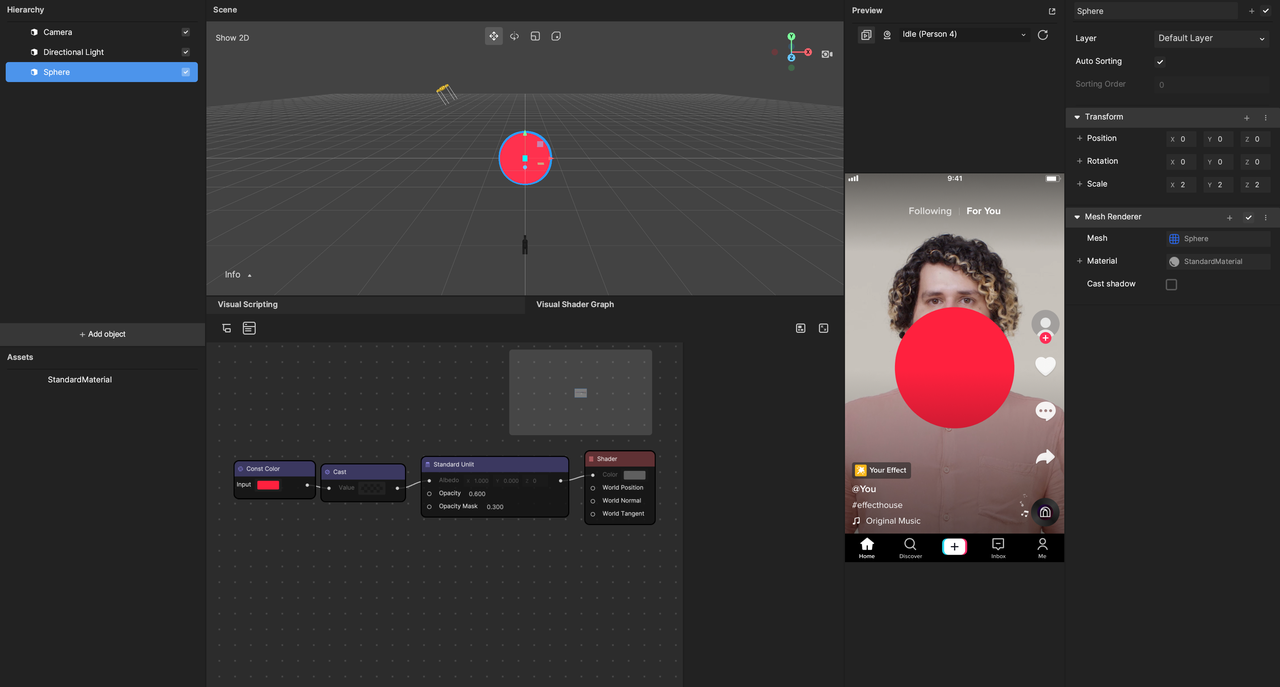
Albedo works as the base color that is rendered to the material. Albedo is a vector3 data type, so it accepts vec3 inputs. You can also pass a color to Albedo by using the Cast node to cast the Color data type to a vec3 data type.
Opacity
Opacity is a float that controls the color transparency. A value of 1 corresponds to full opacity, while a value of 0 is fully transparent.
Opacity Mask
Opacity Mask does not display pixels with an Opacity Mask value below 0.2. Opacity Mask only takes effect if the Opacity Mask checkbox is checked in the Details sidebar.
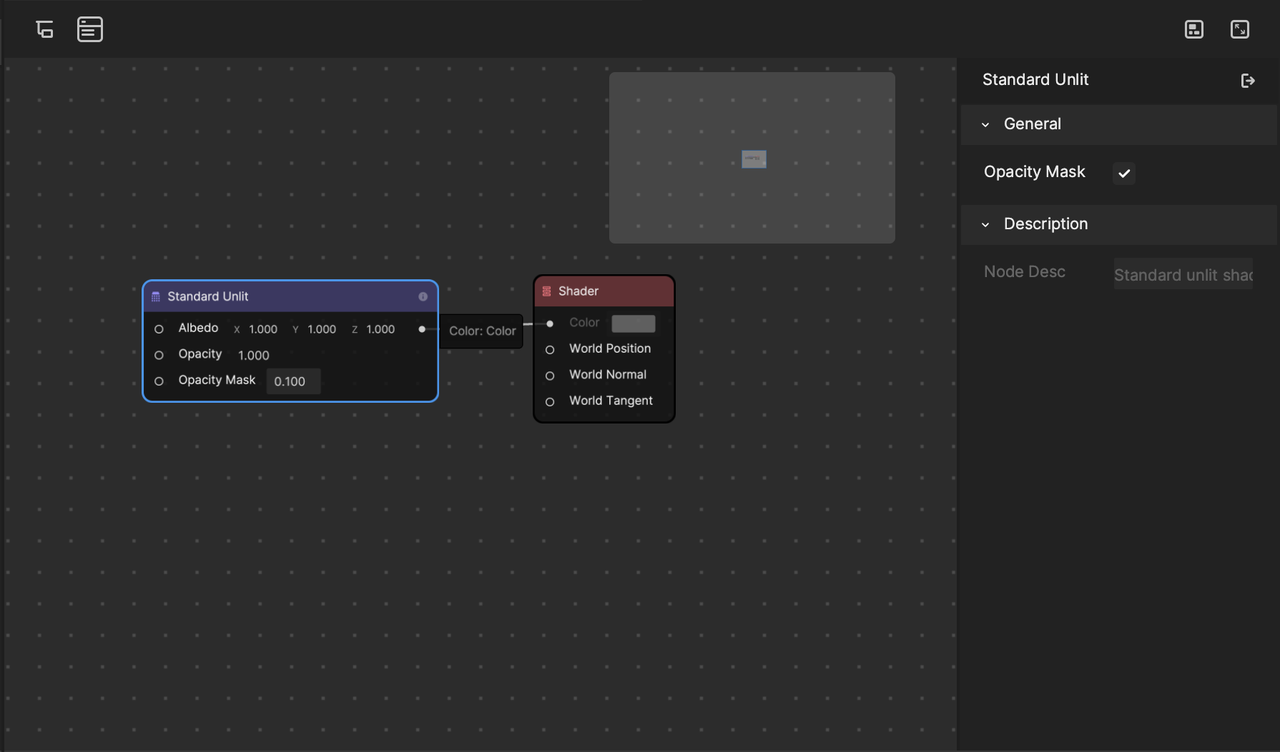
For example, if the Opacity Mask value is set to 0.15 and the checkbox is checked, the pixels are not displayed.
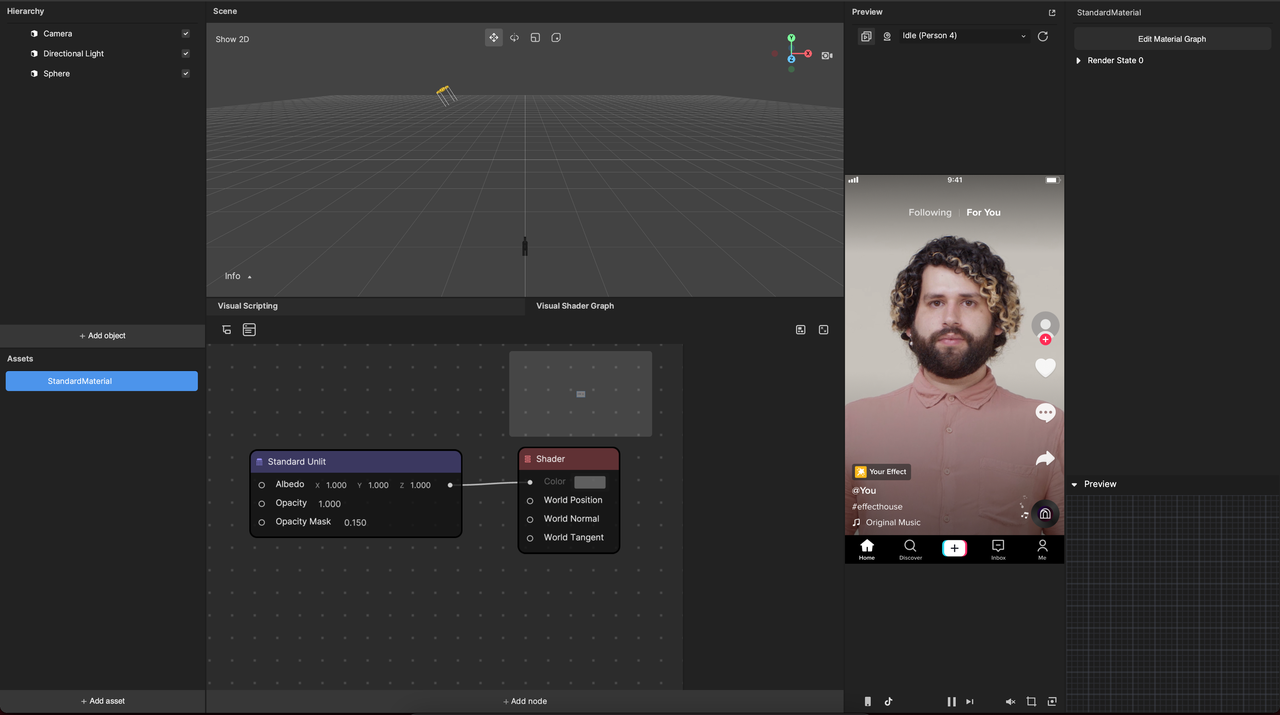
If the Opacity Mask value is set to 0.3 and the checkbox is checked, then no pixels are discarded.
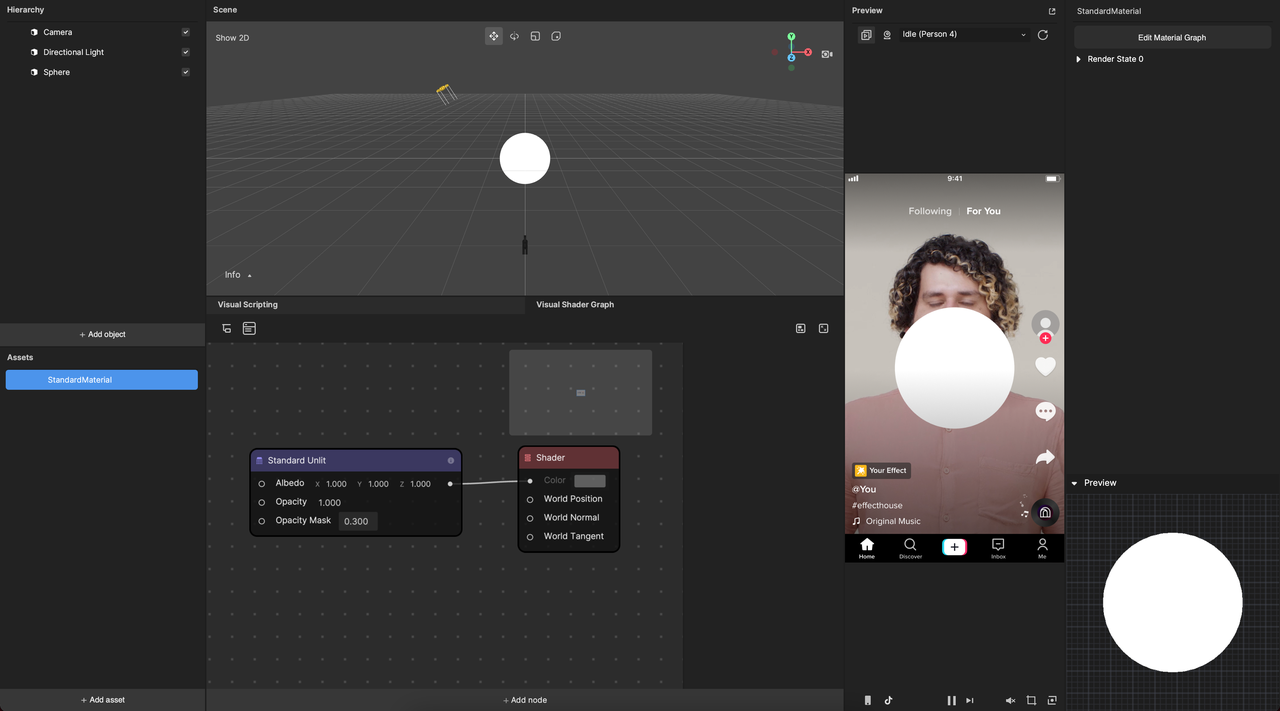
Create an Unlit Material
To make a solid color material, first click on the Add button [+] in the Asset panel, go to Custom Material, and select Empty Material.

Then add a Sphere object in the Hierarchy panel. You will add your custom material to this object. Select the Sphere object, go to the Inspector panel, and then click the Material field. Select your newly added material.
Add a Standard Unlit node and connect its Color: Color output to the Shader node's Color input. Then add a Const Color node. Add a Cas node, and connect the Const Color node's output to the Cast node's input.
Select the Cast node and then click the Details button in the Material Editor toolbar. Change the Cast Type to Vec3. Now you can connect the Cast node's output to the Standard Unlit node's Albedo input.
If you want to use a texture, you can alternatively use a Sample Texture 2D node instead of a static color. To do so, add a Sample Texture 2D node and connect its RGB Vector3f output to the Standard Unlit node's Albedo input. Then go to My Items and add a Texture 2D parameter. Add the Texture 2D parameter as a node, and connect it to the Sample Texture 2D node's Texture 2D input.
To modify the material's Opacity, select your material in the Assets panel, then go over to the Inspector panel and expand Render State 0. Make sure the Blend Mode is set to Transparent.
Then click the My Items icon in the Material Editor toolbar and click the Add button [+] next to Parameters. Add a Float parameter, and rename it to "Opacity". Click the icon next to your new Opacity parameter to add it as a node.
Connect the Opacity parameter node to the Standard Unlit node's Opacity input. Now you can change the material's Opacity property in the Inspector panel. Choose a value between 0 and 1.
Optionally you can also add a Float parameter from My Items and name it Opacity Mask. To use the Opacity Mask functionality, make sure to select the Standard Unlit node, click the Details icon in the Material Editor toolbar, and select the Opacity Mask checkbox.